iMovie Tutorial, Lesson #4
5
pages
English
Documents
Le téléchargement nécessite un accès à la bibliothèque YouScribe Tout savoir sur nos offres
5
pages
English
Documents
Le téléchargement nécessite un accès à la bibliothèque YouScribe Tout savoir sur nos offres
4 Lesson 4:Adding Motion and Video Effects 4There are two general kinds of special effects that you can easily add to your movie: motion effects and video effects. Adding a motion effect means speeding up or slowing down your video, or making it play in reverse. Video effects are changes you can make to the color and feel of your footage—for example, adding a sepia tone for an “old-fashioned” feel, or adding a soft focus.Before You BeginTo make it easier to do the tasks in this lesson, print the lesson before you start.In many tasks shown in this lesson and in iMovie Help, you need to choose menu commands, which look like this:Choose Edit > Clear.The first term after Choose is the name of a menu in the iMovie menu bar (shown below). The next term (or terms) are the items you choose from that menu.1Tutorial Motion EffectsYou can make a clip play backward, and you can make whole clips or parts of clips play in slow motion or fast motion. If you reverse the direction of a clip, you can also slow it down or speed it up in reverse.Making a Clip Play in ReverseYou can apply the reverse-motion effect only to a whole clip. If you want to make only a few frames play backwards, separate those frames into their own clip by splitting the clip at the start and end of the desired frames.To reverse clip direction:1 Select the clip you want to reverse. You can select a clip in the clip viewer, the timeline viewer, or in the Clips ...
Voir
4
Lesson 4: Adding Motion and Video Effects
4
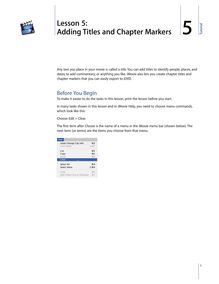
There are two general kinds of special effects that you can easily add to your movie: motion effects and video effects. Adding a motion effect means speeding up or slowing down your video, or making it play in reverse. Video effects are changes you can make to the color and feel of your footage—for example, adding a sepia tone for an “old-fashioned” feel, or adding a soft focus.
Before You Begin To make it easier to do the tasks in this lesson, print the lesson before you start.
In many tasks shown in this lesson and in iMovie Help, you need to choose menu commands, which look like this:
Choose Edit > Clear.
The first term afterChooseis the name of a menu in the iMovie menu bar (shown below). The next term (or terms) are the items you choose from that menu.
1
2
Motion Effects You can make a clip play backward, and you can make whole clips or parts of clips play in slow motion or fast motion. If you reverse the direction of a clip, you can also slow it down or speed it up in reverse. Making a Clip Play in Reverse You can apply the reverse-motion effect only to a whole clip. If you want to make only a few frames play backwards, separate those frames into their own clip by splitting the clip at the start and end of the desired frames. To reverse clip direction: 1Select the clip you want to reverse. You can select a clip in the clip viewer, the timeline viewer, or in the Clips pane. 2Choose Advanced > Reverse Clip Direction. An arrow appears on the clip in the clip viewer to indicate that the clip has been altered to play in reverse. When you play the clip, it plays backward. If you apply the Reverse Clip Direction command to the same clip a second time, the clip returns to its original direction. Speeding Up or Slowing Down Your Video You add slow- and fast-motion effects using the clip speed slider below the timeline viewer, shown below.
Clip speed slider
To adjust the speed of a video clip: 1Click the timeline viewer button (it has a clock on it) to open the timeline viewer. 2Select the clip you want to speed up or slow down. 3Move the clip speed slider left or right to adjust the speed of your video clip. Each tick below the slider means “x+1.” If you move the slider one tick to the left, you will speed up the clip by 2x, or make it play twice as fast. One tick to the right slows it down by 2x, or twice as slow. If you move the slider two ticks to the left, you will speed up the clip by 3x. Two ticks to the right slows it down by 3x. Play the clip in the iMovie monitor to see the effect of slowing down or speeding up the clip. The size of each clip in the timeline viewer corresponds to its length in the movie, giving you a visual indication of how long each of your movie elements is. When you adjust the clip speed slider, the selected clip in the timeline viewer appears longer (if you slow down the video) or shorter (if you speed up the video).
Lesson 4: Adding Motion and Video Effects
Compare the first clip in the movies shown below. The first example shows the clip at normal speed.
In the example below, the same clip has been adjusted to play slower. It now appears much longer in the timeline viewer.
Video Effects iMovie provides an array of interesting video effects that are easy to add to your movie. You can change a whole clip or parts of clips. Like transitions, video effects take time to render, but you can preview the effect before you apply it. Use the Effects pane, shown below, to add effects to your video.
Lesson 4: Adding Motion and Video Effects
3
4
Adding Effects Different effects have different attributes that you set to get just the look you want. For example, if you select Adjust Colors, you can adjust the Hue Shift, Color, and Lightness using the sliders that appear at the bottom of the Effects pane.
Some effects allow you to set where the effect will appear in the clip. For example, if you select Fairy Dust, you can choose where the fairy dust will arc, or choose where the electricity will strike for the Electricity effect. If the pointer changes to a crosshair when you click in the preview monitor, you can click again to select the origination point of the effect. If you don’t see a cross-hair pointer when you click in the preview window, you can’t set the position.
If a clip has a transition attached, you must remove the transition before you can add an effect. After you add the effect, add the transition again. If you know you want to use lots of effects, you’ll save time by applying effects before you work on transitions.
To add a video effect to your movie: 1Click the Effects button to open the Effects pane. 2Select the clip you want to change in the clip viewer or timeline viewer. 3Scroll through the list of effects and select the one you want to apply. 4Drag the Effect In and Effect Out sliders to indicate how quickly you want the effect to fade in and out. Setting the sliders to 00:00 will make the effect appear and disappear suddenly, rather than fade in and out gradually. 5Once you have the effect set up, click Preview to see what it will look like. You can continue adjusting the attributes until you see the results you want. 6Click Apply to render the effect. You can apply more than one effect to the same video clip. Just repeat these steps for each effect you want to add. Editing Effects You can layer effects to create unique effects. For example, you could have fairy dust streaking across a foggy scene. If you change your mind, you can remove an effect if you haven’t saved the movie project or emptied the iMovie Trash since you rendered the effect. If you’ve done either of these things, you’ll have to start again with a new clip if you don’t want to keep the effect. To remove a video effect: 1Select the clip with the effect you want to remove. 2Choose Advanced > Restore Clip.
Lesson 4: Adding Motion and Video Effects
Applying an Effect to Part of a Clip or Multiple Clips You can apply fast-forward, slow-motion, and video effects to multiple clips or to parts of clips, rather than to the whole clip.
To apply an effect to part of a clip, you must first select aframe range,or a portion of the frames within the clip. (You can also select a frame range across a series of contiguous clips in the clip viewer.)
To select a frame range: 1Select the clip or series of clips that include the frames that you want to edit. Hold down the Shift key to select more than one clip. 2Drag the crop markers below the scrubber bar to select the frames to which you want to apply an effect. The selected frame range is yellow in the scrubber bar. 3Add motion or video effects as you would to a clip, as described above.
You can hold down the Command key to select discontiguous clips. Then apply the same effect to all the selected clips.
©2004 Apple Computer, Inc. All rights reserved. Apple, the Apple logo, and iMovie are trademarks of Apple Computer, Inc., registered in the U.S. and other countries. The owner or authorized user of a valid copy of the iMovie software may reproduce this publication for the purpose of learning or teaching to use the software, excluding commercial or paid-for purposes.
